Nursery is (almost) Done!

Yippee! Spent WAY too much time in the nursery today, but it’s almost done! And by almost I mean like 97.456% complete. Here are some pictures.

From the hallway (two directions):
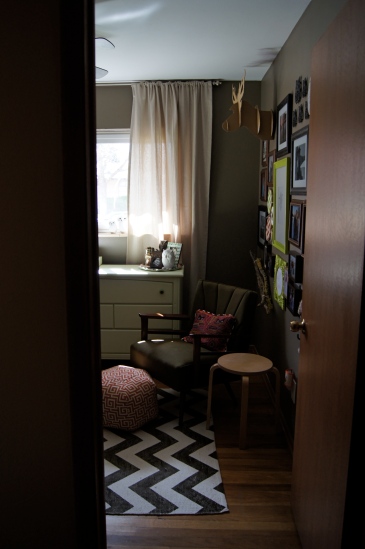
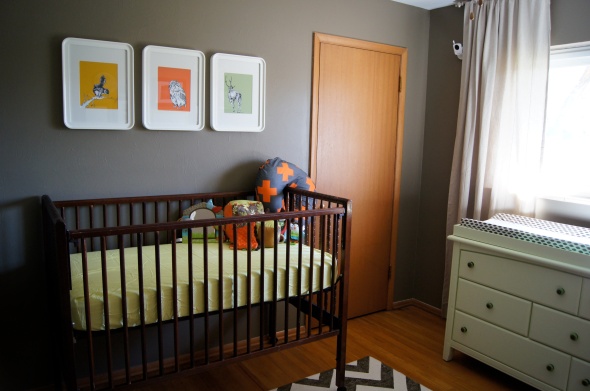
I mentioned it before, but we did a “woodland” theme. So, owls, squirrel, deer, foxes, etc. The base colors are gray and dark brown, with pops of bright yellow (citron), orange and green.

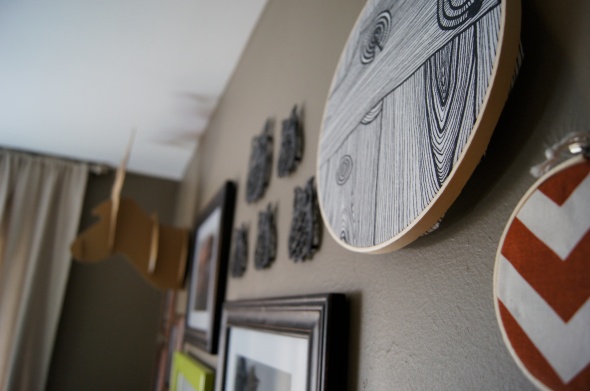
Here’s some pictures of the “family tree” wall.

There are still some missing elements to the wall. We have three pictures to fill in – one will be a print of a family tree, the other will be of baby and the last is a picture of one set of grandparents that we’re waiting on. We’ll order the family tree print once baby is born because his/her name will go on it. And I’m going to make some animal masks (owls, deer, fox, etc.), which will go on the empty hooks.

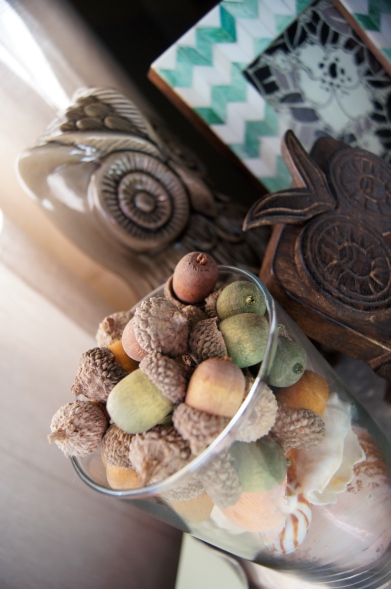
Here’s the dresser/changing table area. We refinished a hand-me-down dresser (thanks Joe and Sara!) and painted it green. Then added some new knobs from Anthropologie. Brady made a frame to hold the changing pad, which is secured to the back of the dresser. We have a tray with a bunch of owls on it now (thanks mom, Matt/Em and Sarah!), but the tray is eventually meant to hold diaper-changing necessities in the future…

The crib is vintage and was purchased used off Craigslist. The prints above the crib are from Etsy, and were actually the inspiration for the entire nursery design. The sensory cubes in the crib were made by a crafty friend (thanks Bo!). And the boppy cover came from Etsy (hooray for a non-corny boppy cover!). I might be able to make a couple additional covers myself, too. Eventually.

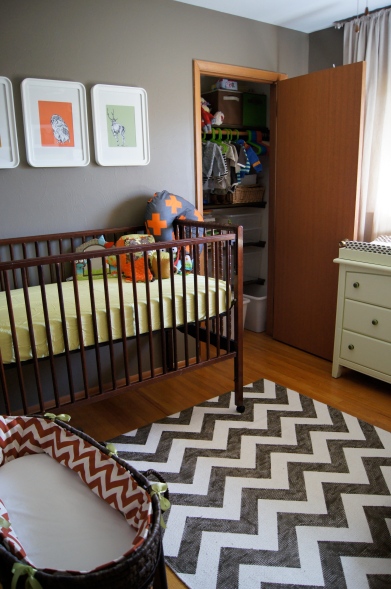
And, the wall with the bassinet is currently awaiting a bookshelf. We’ll get one at some point. I also have my eye on some mirrors that I’d like to sandwich with print that’s on that wall. The bassinet will go in our room when baby arrives; it was purchased off Craigslist (we had registered for the same one, but got it at 1/3 the price…nice), and I re-covered the bumper in a fabric that coordinated with everything else. It was polka dots before with some frilly lace. I’m a fan of lace and all, but I don’t like how cliche lace is on bassinets.

And, finally, the closet. We added some shelfs and bins in there. It’s already full of stuff thanks to generous family and friends.

So, there you have it.

I’m also VERY CLOSE to finishing my quilt! It’ll go in the nursery, but it won’t be for baby necessarily.

Oh, yeah, and we need a baby for the nursery. I don’t think he/she is in any hurry, though…sigh. 38 weeks, two days and counting…

4 Comments

Filed under Baby, Crafty

Last Night I Mounted a Deer

I made a deer head out of cardboard for the nursery last night. This is a grainy iPhone pic, but you get the idea.

20120315-083608.jpg

I followed these instructions, but I wanted it to be bigger than theirs, so I kinda free-sketched my template based on their templates. Turned out pretty good, and it saved me $30 on nursery decor. =)

Blue tried to help. He was not helpful.

20120316-120125.jpg

The deer head will be part of the “family tree wall.” Here’s my style board for that wall:

I got the idea from laybabylay’s nursery. Mine will incorporate more woodland elements, mostly sourced from etsy…unless I can make them myself, like the deer head.

It’s slowly coming together. I need a few more things, and the nursery should be done.  Pictures will be posted once it’s complete!

PS – I am a grumpy grump today. I’m tired. And every single person I’ve seen has said something like: “look how big you’re getting!” Every. single. person. Uh, thanks. I know. I want to yell back “NO S**T!” But, yelling isn’t nice. Humph. OK, enough pregnant lady ranting. I feel (a bit) better now.

2 Comments

Filed under Baby, Crafty

Can I Please Register on Etsy.com?

Oh, babies. That’s all I think/talk about these days. Sorry.

Registering for Baby was no easy task. Not necessarily because we didn’t know what to get, but mostly because of picking the location. I’m not a fan of the big box stores, but that’s the easiest place to send people for baby showers. We completely avoided the Babies R Us madness. We don’t have a Buy Buy Baby near us. So, we chose Target and Amazon.com for our registry. Between the two stores, I think we have the basics covered.

But, neither place (nor any other big box stores) has the cute stuff that everyone loves to get/give at baby showers. Thus, I propose registries on Esty. Etsy people/exectuives, this is my official request. I’m sure you’ll see it since you read my blog a lot. haha.

Anyway…

Look how cute some of this stuff is…and it’s unique. And affordable. And if you want to buy me something off my unofficial registry, here’s a link to my favorites page. =)


Leave a comment

Filed under Baby

Showers for Babies

Going to a baby shower tomorrow for a friend that’s due three weeks before me. They are having a girl. I made her a couple hats with fabric flowers (kanzashi flowers), and a blanket.

My blanket pattern is below if interested.

The blanket pattern:

Chain 111, turn

First row: DC two in first chain. *DC 9. Skip one chain. DC 1. Skip one chain. DC 9. In next chain, DC increase (3 DC).* Repeat from * three times (or longer if you’d like your width to be longer). Your last sequence is a bit different since it ends the row: DC 9. Skip one chain. DC 1. Skip one chain. DC 9. In last chain, DC 2. Turn.

Rows 2 – XX: repeat first row until you reach desired length. I did 78 rows.

Every six rows, I changed colors.

My final blanket ended up being about 30″ x 40″ (or so).

OK, now I need to start making things for my baby! Although I do have a list of other new babies that I’ve been meaning to make things for…urg.

2 Comments

Filed under Baby, Crafty

Kanzashi Flower (fabric flower) Tutorial

Last year, I went with a few friends to a class where we learned to make Kanzashi flowers, aka fabric flowers. It was easy to learn, and I love how they can adorn simple projects to give them some funk. Another bonus: they don’t take a lot of materials to make. I’ve been using them a lot lately.

So, here’s my attempt at a tutorial on how to make them in case you’d like to try.

Materials:

fabric (use scraps…you don’t need much)
rotary cutter and mat (or scissors and a ruler…but the mat and cutter make it much easier)
heavy duty thread
needle
straight pins
E-6000 glue
toothpicks
tweezers
paper towel/newspaper
beads, buttons (or something else you’d like to use for the center of the flower)

I’ll show you how I made the bright pink one pictured below.

Start by cutting fabric. I cut nine, two-inch squares with a rotary cutter and mat.

The first step is to start folding each individual piece. Step one: fold one fabric square in half, so it creates a triangle. Press the seam with your fingers.

Then, fold each side of the triangle in to meet at the top point of the triangle. You’ll now have two more folds. Press seams with your fingers.

Now, pick up the piece of fabric and fold it back in half. You’ll be exposing the side that was facing up.

Two more folds and you’re done with this piece. Take each flap that is currently pointing down, and fold it up so that it just crosses over the top of the fabric.

Insert a straight pin in the center of the piece, making sure to capture all of the fabric. Set aside, and fold the remaining pieces of fabric in the exact same way.

IMPORTANT: everyone will fold the fabric differently, but it’s important that you stay consistent with your method. Otherwise, your petals will look uneven.

Once you’ve folded each piece of fabric, you’ll need to cut off the excess fabric. NOTE: You’re cutting the rough edges, not the pointed edge. Before I start cutting, I usually make sure all of my petals are pointing the same direction, and I’m always cutting to the right of my straight pin. You’ll cut about 1/3 of the fabric off.

I always take care to insert my straight pins in the same spot on each petal. That way, I can cut in the same spot on each without having to make adjustments.

Now that all of your petals are cut, it’s time to thread them together. Thread a needle with heavy duty thread. It’s important that the thread is thick, because you’ll be doing some tugging on it, and you don’t want it to break. Another option is to double or quadruple your thread, if you don’t have heavy duty on hand.

You don’t need much thread. Maybe one arm’s length from wrist to elbow (or so). Once your needle is threaded, tie off the end to keep the loose ends in check.

Start threading each petal. IMPORTANT: again, make sure you use the exact same method with each petal. So, insert the needle in the same spot on each, and make sure all petals are facing the same direction.

Once you have all petals on your thread, we’ll be tying a surgeon’s knot to pull them together.

Pull TIGHT on each side of the thread, until you get a nice and snug circle of petals.

Keep it snug, and tie another knot to secure it in place.

You now have your basic flower shape. You’ll notice, though, that the petals may need some love for them to look uniform. This is when the glue, toothpicks and tweezers come in handy.

I usually put a dab of E-6000 glue in between each petal. Careful with E-6000. It’s super powerful (and better than hot glue…DO NOT use hot glue…it’ll come apart eventually). I typically dab a bit of the glue onto the toothpick, and use the toothpick to spread it on the fabric. I then hold the petal sides together with tweezers until it’s mostly dry. Meanwhile, I shape and fluff the petals as needed.

Here’s a couple pictures showing the gluing process on a different flower.

Once the petals look good, figure out how you want to finish the flower. I like using buttons for the center. You could also roll up a small strip of fabric. Beads work too. Sometimes I use scraps of fabric to give it more texture. Depending on what you decide, you’ll need to glue or sew it in place…or both.

And, you’re done!

To give you an idea for sizing: the larger green/yellow flower at the bottom left was made using 3″ squares. The three medium-sized flowers (beige w/ yellow center, bright pink and pink/beige pattern) were all made using 2″ squares. And, the smaller greenish flower (on the green hat) was made using 1″ squares.

My recommendation: start large. If you’re making your first flower, I’d make one with 3″ squares. It’s a lot easier to work with a larger piece of fabric.

This is just one style of kanzashi flowers (fabric flowers). It’s the only one I’ve mastered so far, and I’m looking forward to learning some others. Neat.

Leave a comment

Filed under Crafty

Mola Pillow For The Nursery – Yay for Owls!

Remember the Mola I bought in Panama? I made it into a pillow for the nursery. Here are some progress shots and a sorta tutorial (I’m not very good at measuring, so maybe it’s not best to follow my lead =)

I started off with a pillow insert I had at home already. The mola fit perfectly to cover one side.

I also had some fabric on hand to use for the back. I chose the dark brown. The orange was too matchy (made up that word just now) and the green was too much of a contrast.

I wanted the back to form a pocket, so I could slide the pillow insert inside. So, I guesstimated the size I’d need and cut two pieces of the brown fabric appropriately. Again, probably better to measure exactly here, so don’t follow my lead. Then, I sewed the right sides together on one side of the pillow (to be more specific, I sewed the mola, or the front, with ONE of the back fabric pieces…you can see my other piece in the background of this photo).

I wanted to have a cord to frame the edges of the pillow. So, I found an old shoelace (from the Boston Marathon…what what) and sewed it in to place. It was my make-shift filler for a cord.

Once in place, I folded the shoelace in half and sewed a line down it again. This made it thick enough to be a good filler.

Once the shoelace filler was ready, I folded the fabric back over so it was right-side out again and sewed along the edge to create the cord.

I then created a hem on the first back piece of fabric.

Now, time to add the second piece of back fabric. Same process. I sewed right sides together first. Just on one side of the pillow.

Then, I repeated the same shoelace-cord process.

After the cord was in place, I repeated the same hemming process for the second back piece. Now, here’s where measuring would’ve been good. I guesstimated the lengths of the back pieces just by laying them over the mola. They overlapped quite a bit, so I thought I’d be covered (or it would be covered…haha, love those puns). Well…I forgot the small little part about the pillow insert. Turns out they wouldn’t cover it after all.

Ho hum. Time for some stitch ripping. I hate stitch ripping. Maybe I should’ve measured.

So, once I repeated the process for the second back piece, I then started paying attention to the sides. I didn’t take any pictures of this (not sure why), but here was my basic process to sew the sides together:

1. I used the fabric from my botched attempt at the second back piece to create cords for both sides. To create the cords, I took 2-3″ wide pieced of fabric and sewed the shoelace to the fabric as shown above. I left about an inch of fabric past the cord so that I had room to sew it to the very edge of the mola.

2. I then turned the entire piece right-side in, and sewed along the edges of the pillow to gather all of the loose ends.

3. I then trimmed/tucked the corners.

And, bingo. Pillow for the nursery.

The last picture gives you a sneak-peek of the nursery. It’s pretty close, but it’s not quite done, so that’s all you get to see for now. =) I love the how the geometric pattern of the mola syncs up with all of the other bold geometric patterns we have going on in the nursery.

Well, there’s your sorta tutorial on pillow-making with cords and folds (not sure what official terms are). Hopefully I didn’t thoroughly confuse you.

UPDATE: Piping! It’s called piping! Not cord or cords or cording…

1 Comment

Filed under Baby, Crafty

Casco Viejo – My Favorite ‘Hood in Panama City, Panama

Yup, it’s been a month since I posted something. I’m just going to pretend that gap of time didn’t happen, and continue blogging with some thoughts about our trip to Panama…

Our impression of the city was unexpected. I imagined a booming metropolis. I had read a New York Times article from April 2011 that said there were 30 skyscrapers under construction. I also thought the American influence/presence related to the canal would have heightened development. Then, after flying in and seeing the skyline, I really thought this would be a mini Chicago or New York City.

Turns out, I was wrong. Yes, the skyline is impressive (mostly residential), and there are lots of buildings under construction. However, I didn’t find the city to be that dynamic. With the exception of Casco Viejo (which I’ll get to later), there were no cute neighborhoods or shopping districts to explore. Getting around the city on foot was not possible. The only mass transit system was the bus, and it was way too hot for us to want to attempt that. Apparently they’re building a subway.

So, all in all, it seemed like Panama City might be on its way. But it’s definitely not what I would consider a booming metropolis at the moment. It’s a very large Central American city that is going through a growth spurt.

We did enjoy spending some time in the Casco Viejo Neighborhood. They call this the “old city.” Architectural character galore. Like the “new city,” it’s going through its own rebirth. There’s a huge contrast between old and new.

There are several squares, some nice restaurants, heladerias, boutiques and coffee shops. There are also buildings in complete ruin that are nearly crumbling to the ground, saved by the steel beams that support their collapsing walls. There are some streets that give you a very sketchy vibe. Not unsafe, but maybe not comfortable.

We traversed the neighborhood on cobblestone streets and narrow roads/sidewalks and ducked in to a few shops and restaurants.

Here’s a cute boutique we visited. It’s called Espacio Vintage, and it’s adorable. I would’ve bought LOTS of things if I knew I 1) didn’t have room in my suitcase and 2) didn’t have a huge list of baby stuff to buy. If you go to Casco Viejo, visit this shop. It was off Avenida A, but I’m not recalling the cross street.

We got Emily one of these bracelets, which was painted by a local artist. Same artist that painted the murals on the walls of the shop (inside and out).

We also went shopping at Diablo Rosso, which is off Avenida A and Calle 7. It’s another good stop if you go to Casco Viejo. Cute boutique, art gallery and cafe all in one.

A dress made out of felt balls! =)

We got a shirt here for Matthew, as a thank you for taking care of our Lola girl.

And then, lunch. We ate at La rosa de los Vientos, off Calle Octava. It was a very nice Italian place that looks out over the waterfront. Great pizza. They had an outdoor patio, but we opted to eat indoors since they hadn’t lifted the umbrellas yet.

This little guy entertained us during lunch while playing with a balloon in the street outside.

And then, more walking through the neighborhood. This area was probably my favorite spot in all of Panama City, and I’d highly recommend visiting if you go to Panama.

Leave a comment

Filed under Adventurous

Adventures in the Pearl Islands

We went island hopping today. We’re staying on Isla Contadora, in the Pearl Islands off the coast of Panama. Today, we got to see a few of the other islands nearby. Here’s a pic of Barb and Jim on our boat.

Our first stop was on Mogo Mogo island (I think that’s the name…), where season 7 of Survivor was filmed. We snorkeled there for about an hour. The island is uninhabited, except for a police (aka coast guard) station. The coral was really pretty, and we saw a ton of fish…including a porcupine puffer and an eel. One cute little fish was tagging along close to Brady’s hip for a good 10 – 15 minutes. Here’s a picture of the bay where we snorkeled.

Then we stopped on another nearby island. I forget the name. It didn’t have any trees, and provided good picture opps. We walked around and collected some shells.

Here’s a pic of Brady and I on our third island stop. More exploring and shell collecting. We also swam a bit on the beach here. The water was perfect. By the way, I’m loving swimming in the ocean. I’m weightless and love it. As soon as I get out of the water, gravity hits and my back starts hurting again. Boooo.

Not sure what I’ll do with the shells yet. I collected orange and white ones…maybe they’ll go somewhere in the baby’s room.

Leave a comment

Filed under Adventurous

Mola From Panama

At the market in El Valle de Anton (El Valle), Panama, I found an awesome mola for the nursery. Molas are traditional garments that are made by the indigenous women (the Kunas) of Panama and Columbia. They are hand-stiched cut-outs with many layers and vibrant colors.

We had passed many stands with molas during our first few days in Panama City. I love buying unique things from places we visit, and I was thinking a mola would be great to bring back, but I didn’t know what I’d do with one at first. The colors are so bright and vibrant, which is what makes them beautiful, but they don’t really go with our style or decor.

In El Valle, we had some time to kill, so we visited the local market and I took some time going through a stack of molas. The women who made them showed them each to me. She was very sweet and I tried my best to communicate with her through broken spanish.

I tried to tell her I was looking for an owl. I had no idea what the word for “owl” was. But, through some hand motions and hoots, I finally got it across. =) I had a few options to choose from, and ended up picking this one.

Not a great picture of the one I chose, but hopefully you get the idea. I like the abstract/geometric design and that orange is the main color. I’m going to turn it into a pillow…probably with a chevron pattern backing. It’ll go with all of the other geometric patters that we’re putting into the nursery, and it’ll be a story to tell Baby once he/she understands. We hit the third trimester mark tomorrow, and this baby has already been to two international locations (plus many others). =)

Leave a comment

Filed under Adventurous, Baby, Crafty

Hola From Panama

Hello from Panama! We’ve been here since Saturday. Spent the first few days exploring Panama City, and now we’re on Isla Contadora, part of the Pearl Islands off the Pacific Coast of the country.

Here are some pics from the first few days.

Leave a comment

Filed under Adventurous